Thursday, May 23, 2013

Roly-poly blog tour + giveaway

Welcome to my stop on the Roly-poly-along Blog Tour!  If you're not already familiar with it, the roly-poly is a pinafore tunic pattern designed by the lovely, talented, and genuinely witty Rachael Gander of Imagine Gnats.  I started following Rachael's blog shortly before I met her in person last October and have to admit that I was a little intimidated to meet her.  I needn't have been, though.  She is warm, down-to-earth and perfectly friendly.  This is her first ever sewing pattern for a garment, and I am more than happy to help her promote it.  It really is a fabulous pattern.

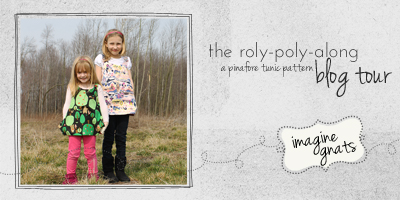
Don't miss the roly-poly pattern giveaway at the end of this post!


I decided on an asterisk roly-poly for my second take on the pattern (my first version was done when I tested the pattern for Rachael).  I'm a little obsessed with asterisks, although I really like most typographical symbols (or glyphs); and I'm always happy to be able to use a semicolon in my writing.  Did you notice that, back there, how I slipped in a semicolon in the sentence about semicolons?!  Yes, I know I'm a nerd.


Anyway... the roly-poly.  The pattern is reversible, which is awesome for two reasons at least:  a) There are no visible seams or hems to worry about.  b) You can simply turn it the other way around if it gets dirty -- perfect for dealing with ice cream drips and other causalities of summer.  I used Essex linen in gray for the giant wonky asterisk on the outside front of the pinafore and a cotton print (Tent in rose by Brandon Mably for Rowan) for the negative space.


On the reverse side, I used the Essex linen again with a simple tiny little asterisk applique in the print fabric.  For the back of both sides, I used the same cotton print.  Don't you just love the criss-cross in the back?  And the cute little pleat in the front?  Plus, you can make the pinafore with or without pockets -- I chose to add pockets to the front side, but not the reverse.  These are the perfect little details that make this pattern unique.


And, although I could have constructed the big asterisk as a huge applique, I chose instead to piece it... partly because I was frugally trying to conserve fabric... but also, why not challenge myself with piecing curves and points when I had never done it before and it could easily end in an epic fail?!  Somehow, with a little seam ripping, lots and lots and lots of pins (!), much pressing with the iron, and shear luck, I managed to make it work.  Whew!


At the end of our photo shoot, my daughter took the roly-poly for a "roll" (sorry!) on her scooter.  It worked well -- I think the photos speak for themselves!


If you'd like to make your own version of the roly-poly, you can purchase the pattern here.  Or, even better, Rachael has allowed me to give one free pattern away here!

To win a copy of the roly-poly pinafore tunic pattern, simply leave a comment below before 6pm EST on Thursday, May 30.  Please make sure your email is included in your comment, especially if it's not connected to your blogger profile.

Here's the entire roly-poly blog tour schedule, so you can check out any posts you may have missed, as well as the ones coming up the rest of this week and next:

5.13 Jill Made with Moxie / Stephanie The Crafty Kitty
5.14 Stephanie NeurosesGalore / Cherie you & mie
5.15 Ari Max California / Caila Caila Made
5.16 Veronica SewVery / Tara Girl like the sea
5.17 Nancy owen's olivia / Adrianna Crafterhours

5.20 Ajaire Call ajaire / Sarah EmmylouBeeDoo
5.21 Laura Craftstorming / Jessica a little gray
5.22 Frances Miss Matatabi / Nicke kiss kiss quilt
5.23 Amy formwork design / Kat Sew Chibi
5.24 Joanne Rose & Dahlia / Amanda Kitschy Coo

5.27 Celina Petit a Petit and family / Delia Delia Creates
5.28 Christy a.Amelia handmade / Carolyn Fake It While You Make It
5.29 Bonnie Fishsticks Designs / Maria La Inglesita
5.30 Jane Buzzmills / Kate Things for Charlie
5.31 Polly Jack & GeeGee / Molly Rose & Odin


Thursday, May 16, 2013

Press, cut, sew, press, sew {repeat}

I've been busy, busy, busy following the steps above, but wanted to pop in here for just a moment.  I'm stitching up as much as possible for an art fair that I'm participating in this weekend.  And crossing my fingers for lovely weather (the forecast says possible rain) and lots of sales (pretty please?).


This shoulder bag is one of the things I've been making.  (Forgive the cluttered background and bad lighting -- I don't have time to stage a proper photo right now!!)  I designed the bag around this amazing architecturally graphic fabric I found at IKEA recently.  It's called Bjornloka Figur.  Cool, huh?


{image from ikea.com}

It was screaming out to me, "I want to be a bag!!"  Don't you see it?!  The colored "Y"s on one side, and the white "Y" on the other?  Plus the fabric has just enough of the black field in the middle to cut the shoulder straps from.  I managed to find solids fabrics from my local Joann's to match the mustard and blue for lining the bags and straps.  Here are some bags with the blue lining on my cutting table (aka dining room table).


I'm fortunate to have my sewing machine in our sunny back room and so have been enjoying the sun and warm breezes of this beautiful almost-summer while I work.  Speaking of my sewing desk, I'd better get back to the process of pressing, cutting, sewing, etc. before I run out of time, but I wanted to share this last image, because I love it for so many reasons.


This was taken last weekend.  My 9 year old son is in our backyard fort with the laptop, working on a research project for school.  I like the view of him, concentrating, through the "window" of the missing board.  It's a cool-ish, but sunny, spring day, and our Prairiefire Crabapple is in full bloom.

Sunday, May 12, 2013

We have a winner!

Thank you so much to all of you who read and commented on my giveaway post, as part of Sew, Mama, Sew's Giveaway Day.  I loved having so many new visitors to my blog, and am also flattered that many of you decided to become new followers.  I hope you'll enjoy following along with me and my sewing and design adventures!

By way of a back-to-basics actual drawing out of a bag... the lucky winner of the two patterns from Such Designs and the Handmade Home book by Amanda Soule is... SIMPLESEW, comment #72.  Congratulations!!  I've emailed you for your address, and will be sending the book and patterns to you shortly!


And to all you moms out there, happy Mother's Day!  I've had time to garden and sew today, and received some wonderful handmade gifts from my kids, so a lovely day for me so far!

Wednesday, May 8, 2013

Itty bitty baby clothes

My new baby niece is scheduled to arrive in this world tomorrow!!  I'm so excited to have a teeny tiny baby in the family again for many reasons, but top among them is the excuse to sew adorable little clothes.  Of course I'm also completely excited for my sister's expanding family and all that other awesome stuff, including the idea of getting to know a brand new person, and smelling the sweet baby smell on the top of her little head.  But, well, sewing tiny clothes is pretty fun, too, right?!


My daughter and I found this cute infant-sized embroidered and smocked top on sale, but we couldn't find any bottoms to go with it.  So I made these little bitty blue jeans.  Okay, they're not really technically jeans.  I used denim-colored linen/cotton (not actual denim) and I didn't add pockets or any type of "jean" detailing.  They kind of look like jeans, though, because of the color and texture, so that's what I'm calling them.  I designed the appliqued knee patches to go with the embroidery motif of the top, but I also wanted it to be simple and graphic, 'cause that's kind of my sewing style.  Hopefully the knee patches are where her actual knees will be -- hard to tell without her here to try them on!


Fabric:  Essex yarn dyed linen/cotton in Denim
Pattern:  Basic newborn pant pattern and tutorial from Made by Rae.


And I made this dress.  I had been toying with different fabrics from my stash for the dress, then I found this orange print from Denyse Schmidt's DS Quilts collection at Joann's.  I like the retro feel and the soft orange color of the print.  It just blows me away that there will soon be this tiny, fragile and amazing person who will (hopefully) be able to fit into this dress.  (I can't quite seem to remember when my kids where that small anymore!)  It has an applique of an asterisk because I like that symbol... and it's part of my business name... and, well, I couldn't really think of anything else except a bird or a butterfly, and those just didn't seem quite right to me.


Fabric:  an orange print from the DS Quilts collection (There's no specific print name on the selvage and I couldn't even find an image on Google in order to identify it.)
Pattern:  Infant peasant dress pattern and tutorial from Sew Much Ado.

I'll be sending these off later this week.  Welcome to the world, little girl!  I can't wait to meet you.

Monday, May 6, 2013

Sew,Mama,Sew! Giveaway

It's that day (week, really) again!  Today and all week long, you'll find links to many, many amazing giveaways on the Sew, Mama, Sew! blog.  You may want to grab a cup of coffee and spend a bit of time checking out all the links.  If you're lucky, you'll find a few great new blogs to follow.  Plus you might win something awesome!  Details on how to enter this giveaway are at the bottom of the post.


I'm giving away these two great patterns by Such Designs.  The three little pigs finger puppets pattern includes instructions for a carrying bag to hold the puppets and keep things organized.  The Good Karma quilt can be used as a yoga mat cover, wall hanging, or table runner.


I'm also including this lovely book, Handmade Home, by Amanda Blake Soule of SouleMama.  It's full of sewing projects (more than 30 in all) that celebrate family.  All of the projects can be made using repurposed materials, and many incorporate children's artwork.


One winner will receive all three items:  both patterns and the book.  Simply leave a comment below for a chance to win.  For an extra chance, Follow my blog with Bloglovin or some other way, and let me know that you're following me with a second comment.

Please be sure I have a way to contact you if you're a winner!  If your email is not connected to your blogger profile, please include it in your comment.

The giveaway ends Friday, May 10 at 5 pm EST.  I'll use a completely random (but hands on) method to chose the winner -- this time I'm planning to put every comment in a hat and one of my children will draw a name.   Simple, but effective... and a bit more satisfying than using Random.org.

Good luck!


Friday, May 3, 2013

Upcycled summer top


For my daughter, who loves bright colors and patterns, although she recently claimed her favorite color is black.  This top incorporates both!!  I found a brightly colored t-shirt at Goodwill, then two solid t-shirts (the green and black) to match.  The new cross-over style top is made entirely from the original three tees.  At $2.99 per shirt, the total cost was about $9.00.  Not bad, right?!


I had an idea in my head of what I wanted the top to look like and, using a t-shirt with a similar silhouette, I made a pattern and figured out the details as I went along.  Luckily, knit fabric is pretty forgiving!  I read a bit about sewing on a knit binding, including this tutorial, then cut strips from the black t-shirt to bind the neckline and arms.  The horizontal black band is simply a folded strip of fabric sewn into the seam between the bodice and bottom part of the shirt.  And I cut the original shirts carefully so as to re-use the bottom hems, since I knew my stitches wouldn't look quite as neat and tidy as the original ones.


I made this to enter in Goodwill's Ultimate Upcycling Contest, but then found it so difficult to navigate their contest page -- I had difficulty even finding my own project at first -- that I didn't have the heart to ask others to try to find my project and vote for me.  Anyway, it inspired me to make Ellie a new summer top, and to grow my confidence in sewing knits.  So, definitely worth the effort, I'd say.  It looks comfy doesn't it?  Wonder if I could manage to make one for myself...