Showing posts with label garment. Show all posts

Thursday, May 23, 2013

Roly-poly blog tour + giveaway

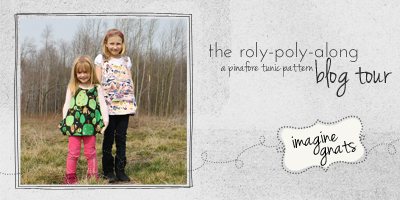
Welcome to my stop on the Roly-poly-along Blog Tour!  If you're not already familiar with it, the roly-poly is a pinafore tunic pattern designed by the lovely, talented, and genuinely witty Rachael Gander of Imagine Gnats.  I started following Rachael's blog shortly before I met her in person last October and have to admit that I was a little intimidated to meet her.  I needn't have been, though.  She is warm, down-to-earth and perfectly friendly.  This is her first ever sewing pattern for a garment, and I am more than happy to help her promote it.  It really is a fabulous pattern.

Don't miss the roly-poly pattern giveaway at the end of this post!


I decided on an asterisk roly-poly for my second take on the pattern (my first version was done when I tested the pattern for Rachael).  I'm a little obsessed with asterisks, although I really like most typographical symbols (or glyphs); and I'm always happy to be able to use a semicolon in my writing.  Did you notice that, back there, how I slipped in a semicolon in the sentence about semicolons?!  Yes, I know I'm a nerd.


Anyway... the roly-poly.  The pattern is reversible, which is awesome for two reasons at least:  a) There are no visible seams or hems to worry about.  b) You can simply turn it the other way around if it gets dirty -- perfect for dealing with ice cream drips and other causalities of summer.  I used Essex linen in gray for the giant wonky asterisk on the outside front of the pinafore and a cotton print (Tent in rose by Brandon Mably for Rowan) for the negative space.


On the reverse side, I used the Essex linen again with a simple tiny little asterisk applique in the print fabric.  For the back of both sides, I used the same cotton print.  Don't you just love the criss-cross in the back?  And the cute little pleat in the front?  Plus, you can make the pinafore with or without pockets -- I chose to add pockets to the front side, but not the reverse.  These are the perfect little details that make this pattern unique.


And, although I could have constructed the big asterisk as a huge applique, I chose instead to piece it... partly because I was frugally trying to conserve fabric... but also, why not challenge myself with piecing curves and points when I had never done it before and it could easily end in an epic fail?!  Somehow, with a little seam ripping, lots and lots and lots of pins (!), much pressing with the iron, and shear luck, I managed to make it work.  Whew!


At the end of our photo shoot, my daughter took the roly-poly for a "roll" (sorry!) on her scooter.  It worked well -- I think the photos speak for themselves!


If you'd like to make your own version of the roly-poly, you can purchase the pattern here.  Or, even better, Rachael has allowed me to give one free pattern away here!

To win a copy of the roly-poly pinafore tunic pattern, simply leave a comment below before 6pm EST on Thursday, May 30.  Please make sure your email is included in your comment, especially if it's not connected to your blogger profile.

Here's the entire roly-poly blog tour schedule, so you can check out any posts you may have missed, as well as the ones coming up the rest of this week and next:

5.13 Jill Made with Moxie / Stephanie The Crafty Kitty
5.14 Stephanie NeurosesGalore / Cherie you & mie
5.15 Ari Max California / Caila Caila Made
5.16 Veronica SewVery / Tara Girl like the sea
5.17 Nancy owen's olivia / Adrianna Crafterhours

5.20 Ajaire Call ajaire / Sarah EmmylouBeeDoo
5.21 Laura Craftstorming / Jessica a little gray
5.22 Frances Miss Matatabi / Nicke kiss kiss quilt
5.23 Amy formwork design / Kat Sew Chibi
5.24 Joanne Rose & Dahlia / Amanda Kitschy Coo

5.27 Celina Petit a Petit and family / Delia Delia Creates
5.28 Christy a.Amelia handmade / Carolyn Fake It While You Make It
5.29 Bonnie Fishsticks Designs / Maria La Inglesita
5.30 Jane Buzzmills / Kate Things for Charlie
5.31 Polly Jack & GeeGee / Molly Rose & Odin


Wednesday, May 8, 2013

Itty bitty baby clothes

My new baby niece is scheduled to arrive in this world tomorrow!!  I'm so excited to have a teeny tiny baby in the family again for many reasons, but top among them is the excuse to sew adorable little clothes.  Of course I'm also completely excited for my sister's expanding family and all that other awesome stuff, including the idea of getting to know a brand new person, and smelling the sweet baby smell on the top of her little head.  But, well, sewing tiny clothes is pretty fun, too, right?!


My daughter and I found this cute infant-sized embroidered and smocked top on sale, but we couldn't find any bottoms to go with it.  So I made these little bitty blue jeans.  Okay, they're not really technically jeans.  I used denim-colored linen/cotton (not actual denim) and I didn't add pockets or any type of "jean" detailing.  They kind of look like jeans, though, because of the color and texture, so that's what I'm calling them.  I designed the appliqued knee patches to go with the embroidery motif of the top, but I also wanted it to be simple and graphic, 'cause that's kind of my sewing style.  Hopefully the knee patches are where her actual knees will be -- hard to tell without her here to try them on!


Fabric:  Essex yarn dyed linen/cotton in Denim
Pattern:  Basic newborn pant pattern and tutorial from Made by Rae.


And I made this dress.  I had been toying with different fabrics from my stash for the dress, then I found this orange print from Denyse Schmidt's DS Quilts collection at Joann's.  I like the retro feel and the soft orange color of the print.  It just blows me away that there will soon be this tiny, fragile and amazing person who will (hopefully) be able to fit into this dress.  (I can't quite seem to remember when my kids where that small anymore!)  It has an applique of an asterisk because I like that symbol... and it's part of my business name... and, well, I couldn't really think of anything else except a bird or a butterfly, and those just didn't seem quite right to me.


Fabric:  an orange print from the DS Quilts collection (There's no specific print name on the selvage and I couldn't even find an image on Google in order to identify it.)
Pattern:  Infant peasant dress pattern and tutorial from Sew Much Ado.

I'll be sending these off later this week.  Welcome to the world, little girl!  I can't wait to meet you.

Friday, April 5, 2013

Sewing for Easter


Our family doesn't really need Easter outfits.  Our Easter celebrations aren't typically more formal that a slightly-more-fancy-than-usual brunch.  But my childhood memories of Easter involve new, either store-bought or hand sewn, outfits for church.  And I just can't help but want to sew dresses at this time of year.  So, I made this dress for Ellie, inspired by Sew-vivor's emerald challenge and this dress from Garnet Hill Kids.


The dress isn't perfect, but I'm really proud of it for several reasons.  First, I drafted the pattern myself, from scratch.  I made two muslins of the bodice before I finally got it right.  Second, it has an invisible zipper.  I've sewn them in before, but always from a pattern.  The thing about invisible zippers is you have to sew them in last, when you're sewing the seam, and that makes me nervous.  Fortunately, after reading this tutorial and this one for encouragement, I did it... and it worked!  Finally, my daughter adores it, and  I love that it fits her personality.  It's bold, yet elegant; pretty without being too girly; and a bit unexpected.


Of course I had to make a matching tie for Henry, which he pretended not to like, but I think he actually did. I used this tutorial from Very Homemade for the tie, but lengthened it to fit a nine year old.


If I make this dress again, I'll definitely buy more fabric for the skirt so I can add more gathers and make it even fuller.  Also, I had planned to add some appliqued embelishment to the skirt, but ran out of time.  I'd like to do that next time.  But my goofball daughter likes this version, and enjoyed modeling it for you.  Can you tell?

Wednesday, February 27, 2013

Emerson tunic


I finished up Ellie's new tunic last week and I'm happy to say, she loves it!  I followed the Emerson tunic dress tutorial, but re-drafted the pattern for about a size 6, kept it short-ish (so it's more of a top than a dress), and divided the back into two sections like the front, so I could use this awesome Essex yarn dyed linen/cotton in denim for the yoke.  The patterned fabric is something I bought at Hobby Lobby years ago.


I  didn't add the decorative buttons, bird applique, or the strip in the back that the tutorial calls for.  I didn't think it needed those extras, plus Ellie and I thought the buttons down the back might make it uncomfortable for sitting.  The sleeve/shoulder/side seam construction is a bit unusual:  you turn under and hem the sleeves and side seams first, then stitch the side seams together.  I would never have thought of constructing a garment this way, but it ends up making a pretty nice silhouette.


I really like how it turned out overall, but I'm most proud of the inside.  Every single seam is finished!  I repeat:  there are no raw edges anywhere on this garment.  I used a flat-felled seam to join the yoke to the patterned fabric, and french seams at the top of the sleeves.  The side seam construction called for in the tutorial results in a finished side seam, and the extra fabric strip at the inside of the neck line hides the raw edges there.  Can you tell I'm feeling kinda accomplished here?


Here's a happy girl (with her silly you're-taking-a-photo-of-me smile) in her finished top.  It works well for fort playing, too!  Although Ellie and I both like the shape of the shoulders/sleeves, big brother wasn't so convinced.  His comment:  "Mom, you're like that guy on Project Runway who always made the shoulders too big."  I think he was referring to Elena Slivnyak from Season 10...